Yay for the first project of 2020! Ok, so maybe I actually made it in 2019 but since I took a few weeks off from posting it is new and fresh for 2020. This is a great project for an all around crafter, beginning sewist, or anyone looking to get rid of some scraps in a fun way!
My goal for this project was to create a simple, lightweight but colorful bag that I could use for a few of my upcoming trips. I wanted something that made a statement but was still lightweight for travel, and could fit my wallet, phone, lipstick, a diaper and wipes. Are you shocked that this little 11″ wide fits all that? I’m not!
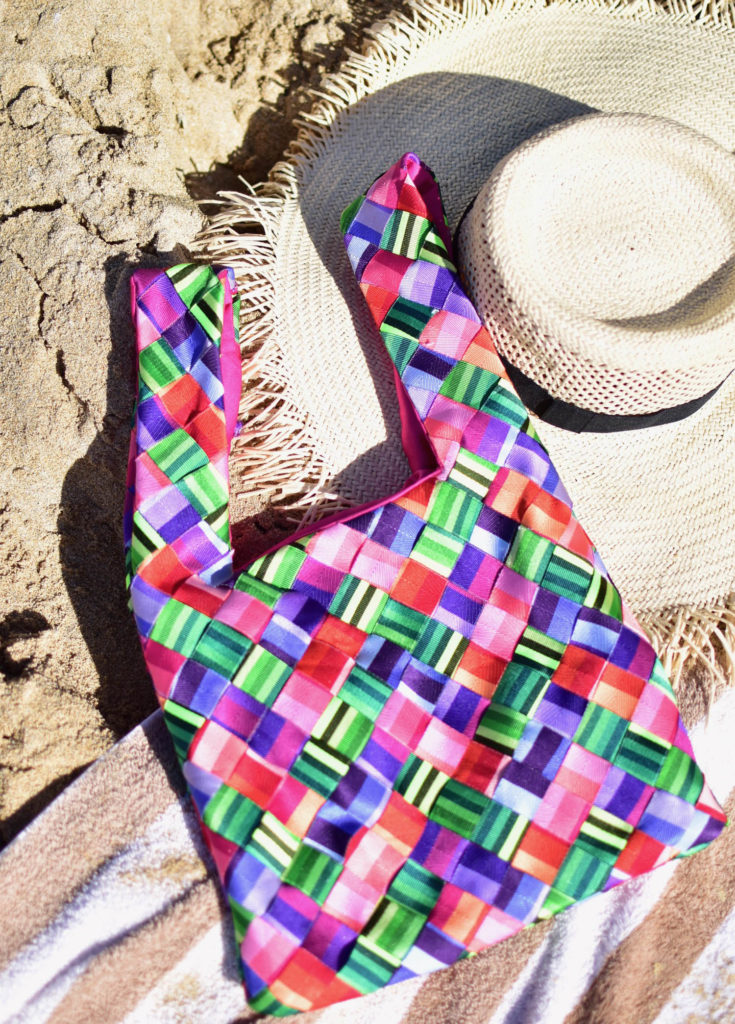
DIY Woven Ribbon Bag
Making this bag is actually super easy and is great for a rainy day activity. Kids will even like weaving the ribbons themselves if you have little ones 5 and up. Below I highlight what you need to make the bag that I made- but get creative and make it your way!
What You Need:
-
-
- 1.5 yards scrap fabric. I used a thick satin, which acts as the backing of the woven part as well as the lining. If you want to use separate fabrics for each part 3/4 yard of each is more than enough
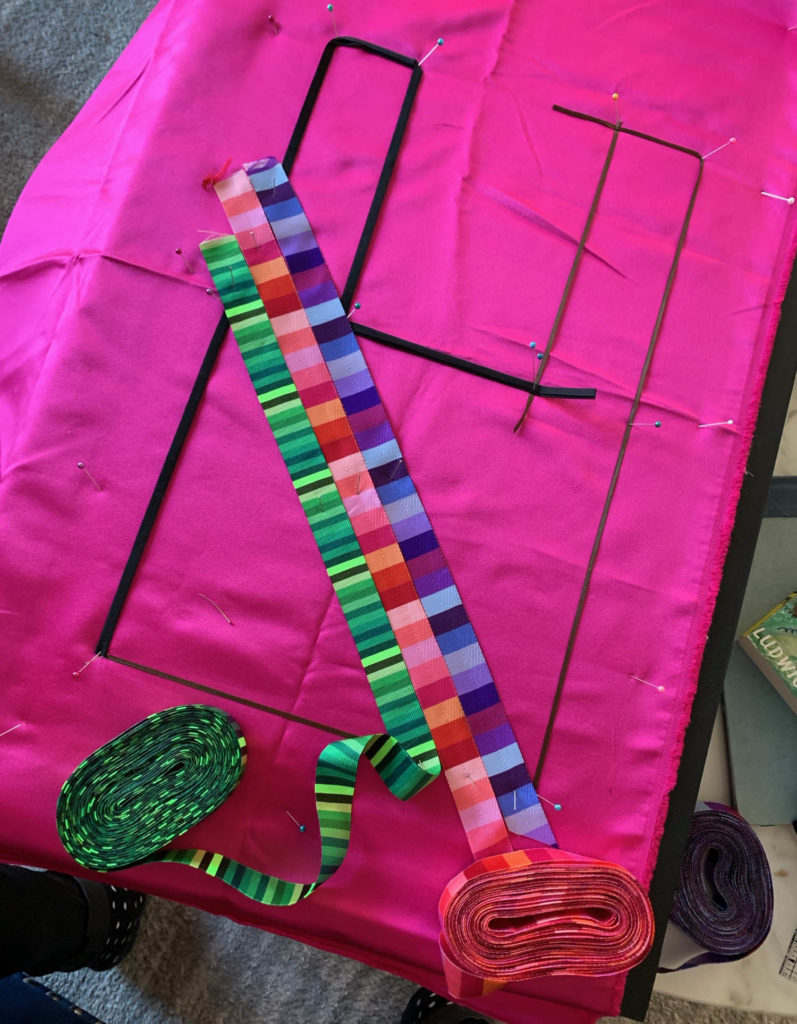
- ~60 ft (20 yards) of ribbon. Seems like a lot, but you can use as many different colors as you want, if you want to get rid of a lot of extra ribbon laying around the house! I used 3 ribbons in mine, which was about 7 yards of each.
- Lots of pins!
- Pin/cork board – makes it easy to weave the ribbons like a loom
- Scissors
- Sewing Machine
- Hand sewing needle and thread
- Ruler
- Disappearing fabric marker
-
Step by Step:
- Decide the size of your bag. Mine was about 10-11″ wide and 15″ tall. I cut a large swath of fabric bigger than that size and pinned it to my cork board. Use your fabric marker and ruler to measure and draw out the border of your bag. Note: I used a thin ribbon to indicate the border in this picture, but opted against that method for the second side!
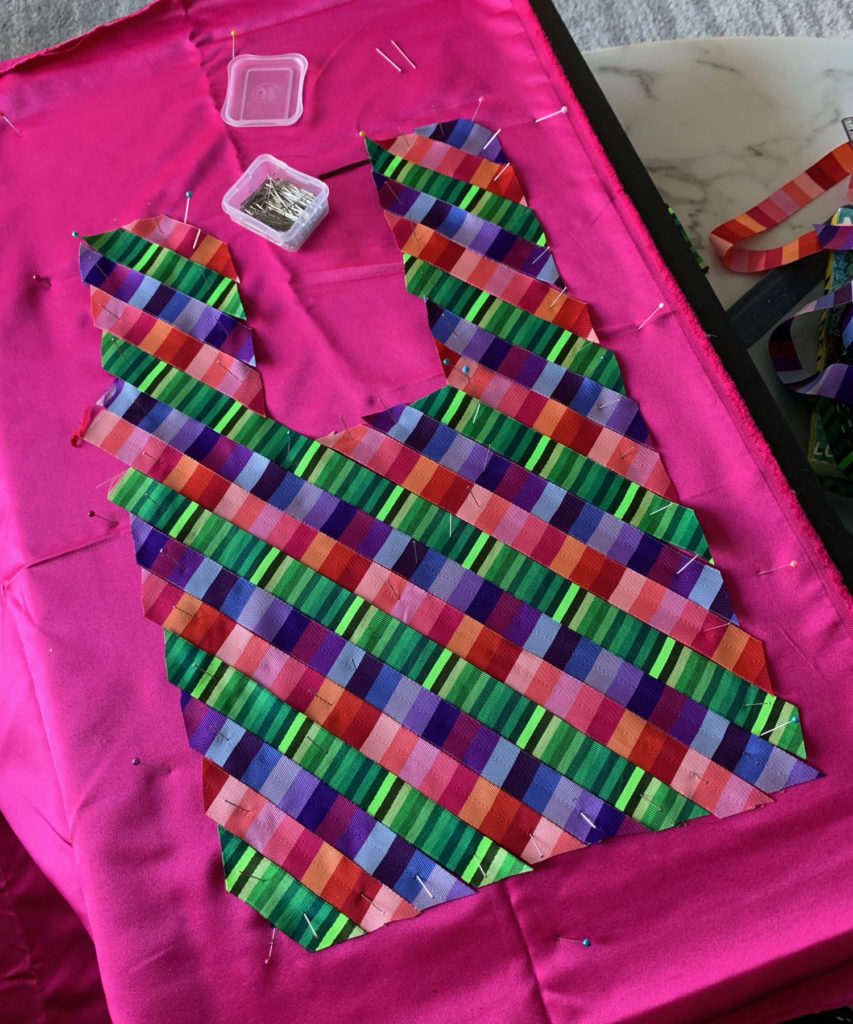
- Start in the middle of your bag and pin your ribbons in a 45 degree angle. Make sure you leave 1/2″ to an 1″ of hangover around the edges. Continue this process throughout the bag, pinning tightly as you go. Once I finished the ribbon placement in one direction, I used my ruler and fabric marker to mark over the border in a few places so that I could see it once I wove in the opposing ribbons.
- Weave in the opposing ribbons carefully and continue to pin and pull tightly as you go. This can be pretty tedious as you have to pull out some pins to weave under and over, but put on a good TV show and enjoy it.
- Using a needle and thread, hand baste the ribbons to the fabric backing around the stitch edge, careful not to sew the pin board by mistake. This way when you remove the pins and take it off the board it will stay intact.
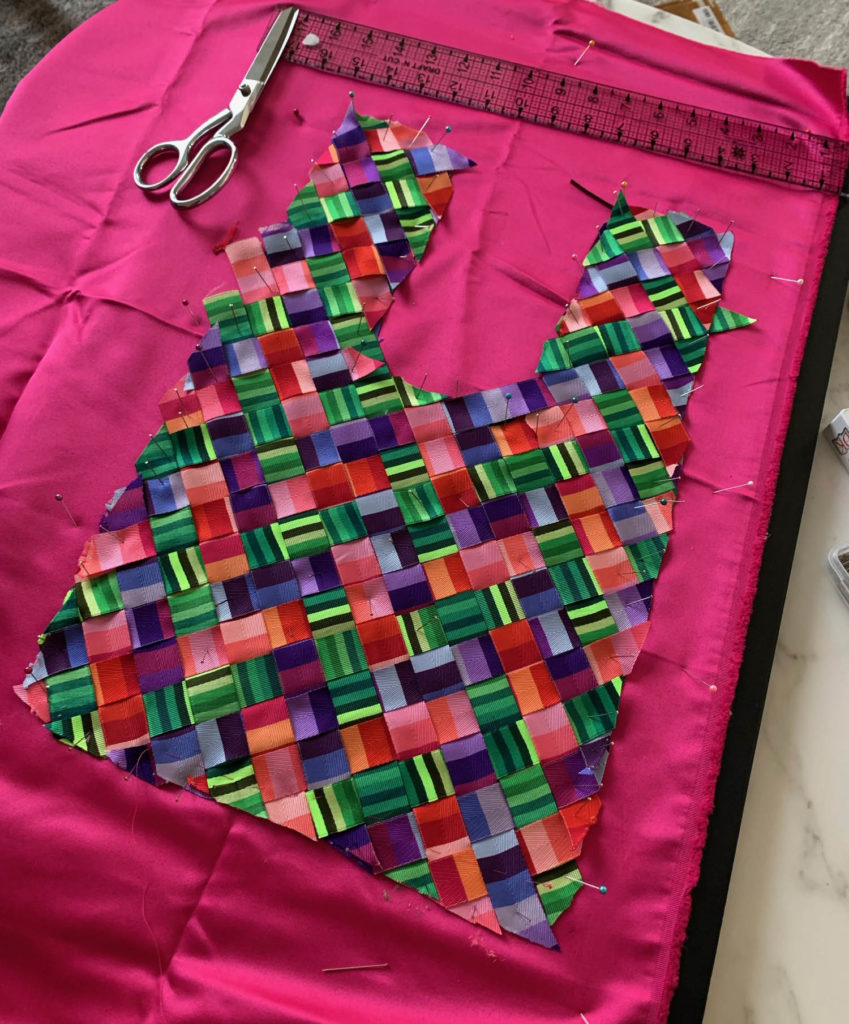
- Repeat for second side
- Measure and cut out 2 more bag shapes in the same fabric or your lining fabric of choice
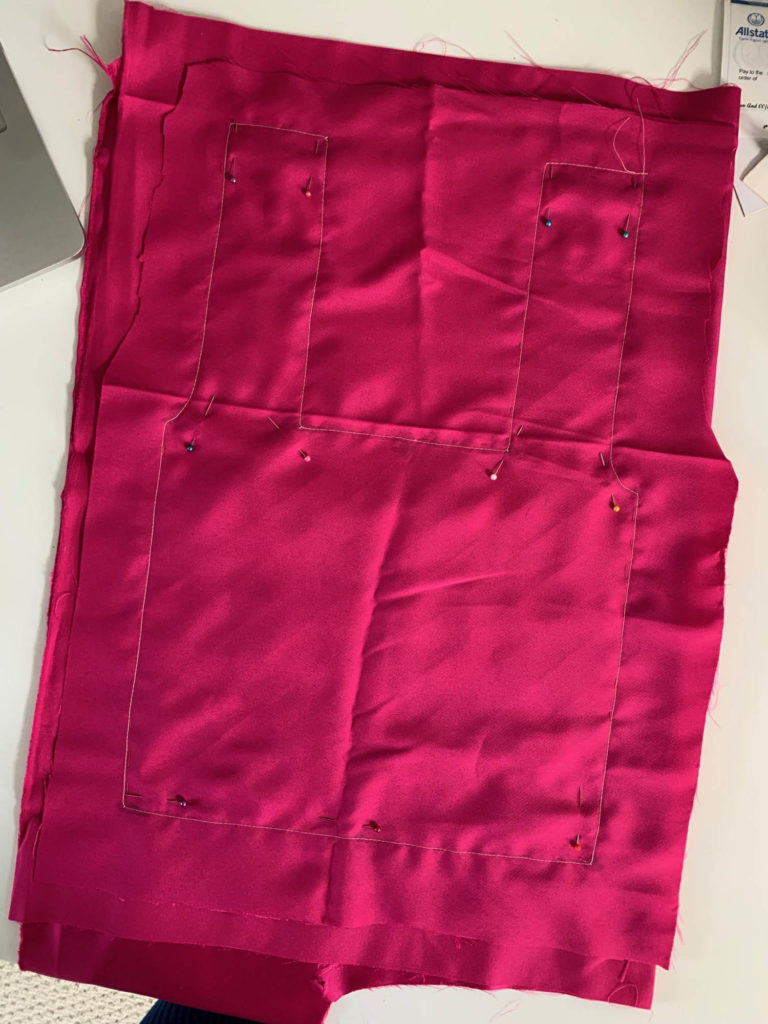
- Using a basic straight stitch, sew over the entire basted border of the ribbon weavings
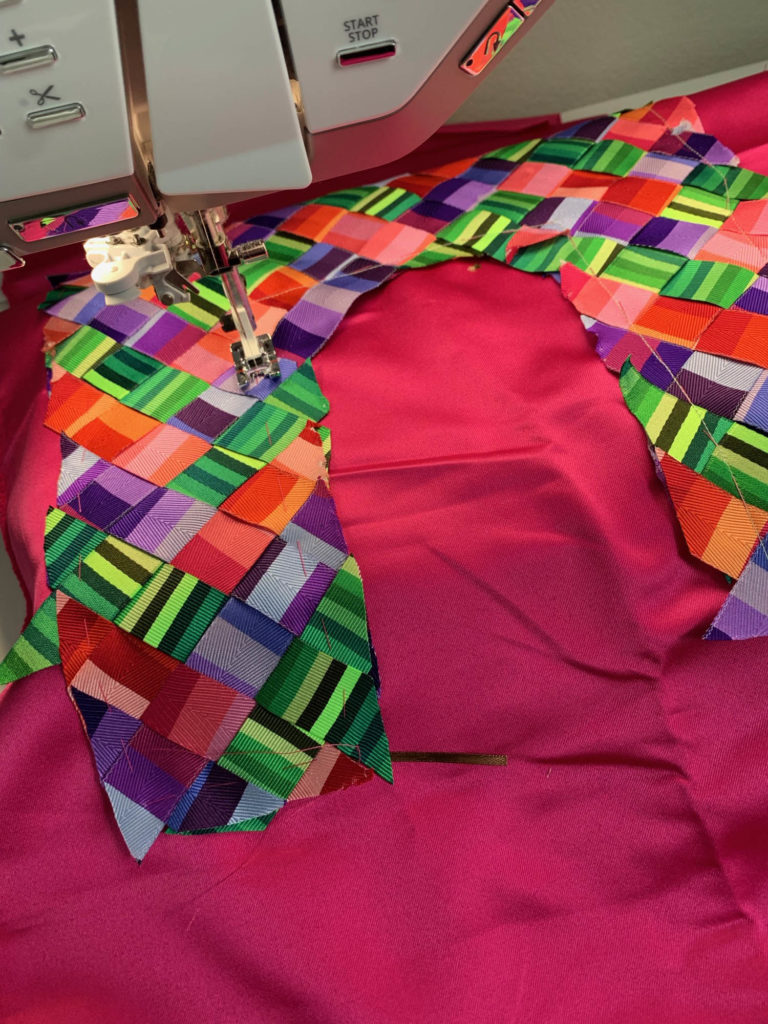
- Sew the ribbon bag and the lining bag right sides facing each other along the outer bottom edge and along the top of the straps. Press.
- Right sides facing together, place one bag in the other and sew the inner square (between the handles) together.
- Trim and turn the bag right side out. Press
- Finally, use pins to press and fold under the outer edge of the straps. I hand sewed these together and pressed again for a cleaner look, but you can also use a machine to stitch the edges if you are super diligent with your stitch line. This bag may seem puffy and bulky at first but pressing makes it all go away! I also suggest using a starch spray to make the pressing process much faster and more precise.
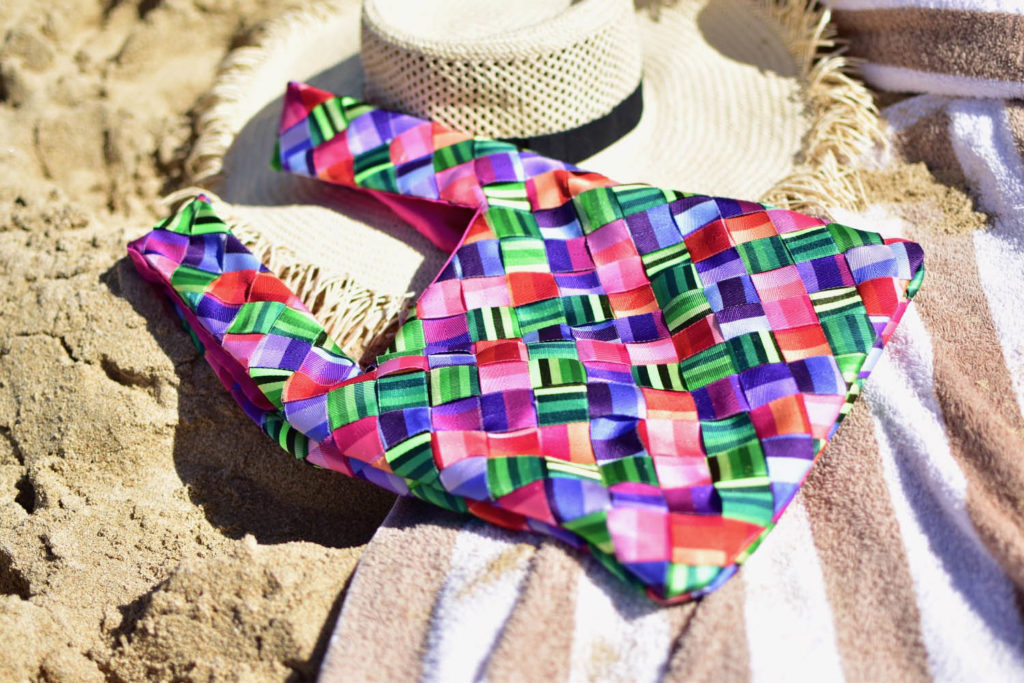

Reading these steps it may sound a little confusing, but this DIY Woven Ribbon Bag was honestly one of the easiest and coolest makes I’ve ever done! The weaving process is really fun and the sewing is quick, making this a great project to do when you have limited time. Have fun with the shape of the bag and the ribbon weaving that you do. Get creative! An accent ribbon here and there or leather straps could be really beautiful!


