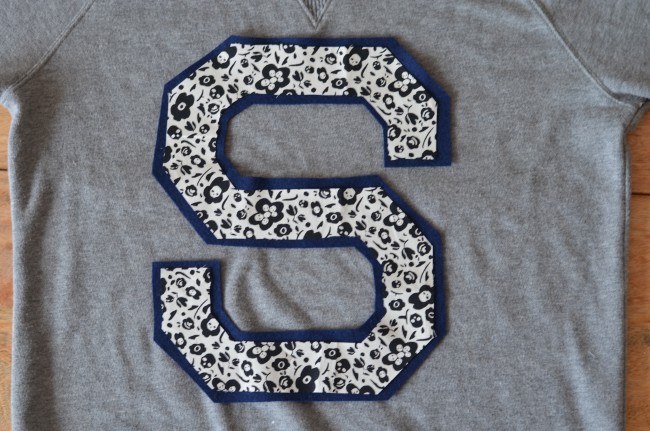
I am so excited to bring you this Varsity letter sweatshirt DIY this week because I’ve been wanting to take one of my closet essentials up a notch, and feel that the varsity trend has only just had it’s kickoff (see what I did there?). Get ready for more varsity inspired looks to come, as I just had my dad fed ex my high school letterman jacket across the country for a work project and now I’m floored with how much I still love the dang thing. Anyway, more on that later, back to the DIY at hand.
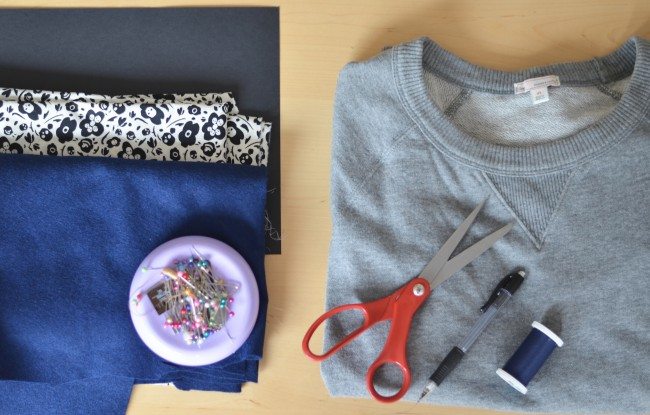
What you need:
Basic crewneck sweatshirt (Mine is Gap, but American Apparel has a ton of great options)
Scissors
Felt fabric in any color at least 8.5″ x 11″
Printed Cotton in any color at least 8.5″ x 11″
8.5″ x 11″ construction paper
Pencil
Straight Pins
Optional needle and thread or fabric glue (not pictured) to attach. I glued mine for now but am planning to serge around the edges later for extra support
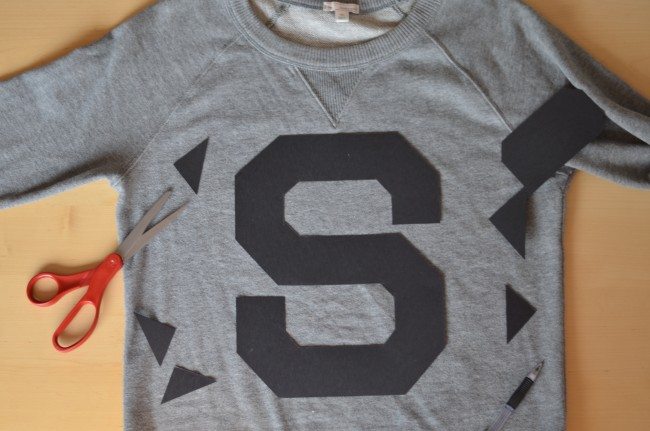 Step 1: Take your 8.5″ x 11″ construction paper and begin to draw out your letter shape. All varsity letter shapes start with a full rectangle shape, so I began to cut the corners equal sizes, and then created an “S” 2 inches thick all around. Google a varsity letter if you need a specific idea of where to cut.
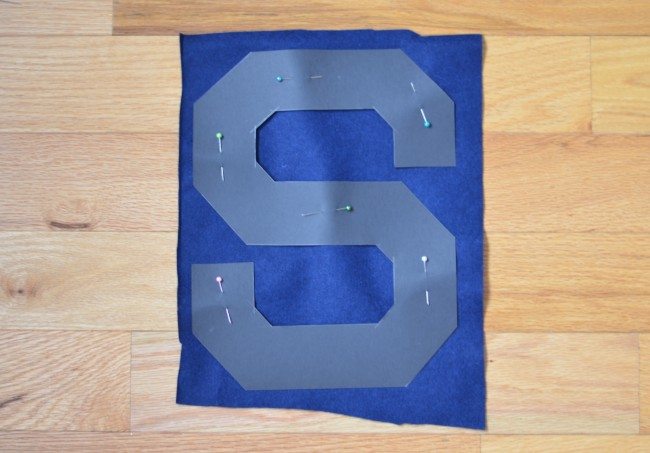
Step 2: Lay out your letter on your solid felt swatch and pin down in place with straight pins. This will be the larger, border layer of your letter. Cut around the shape with precision!
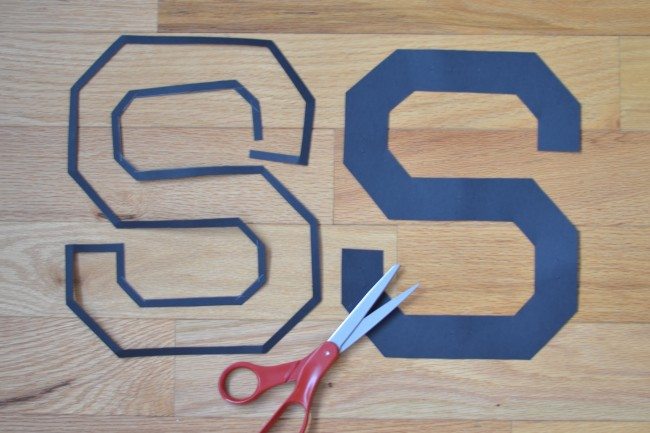
Step 3: Cut a 1/4″ border around your original construction paper letter, making a slightly thinner varsity letter shape
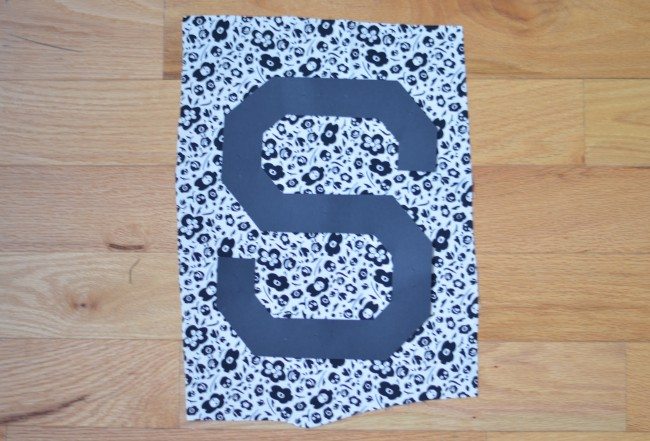
Step 4: Pin down your thinner varsity letter shape on the pattern cotton fabric, and again cut around the border with precision
Step 5: Layout your 2 layers on your sweatshirt, ensuring both are cut and placed exactly as you would like
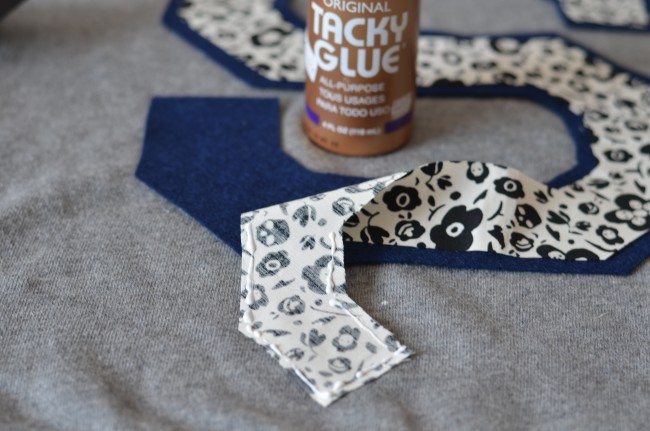
Step 6: Begin glueing or sewing your cotton letter to the felt letter to stay in place. I glued because I wanted to sit in front of the TV and watch the Preakness Stakes, but I plan on sewing later so it keeps longer. If you glue, make sure you use a flexible fabric glue like Alene’s.
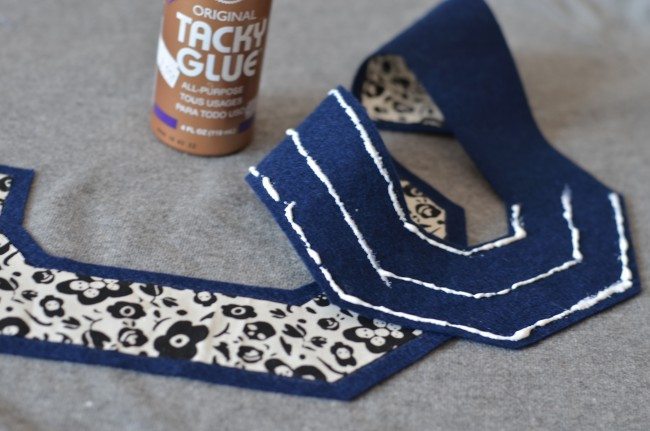
Step 7: Finally glue your felt piece to the sweatshirt. I glued small sections at a time to make sure that I did not smear the glue and ruin the fabric – that wiggly ‘S’ was tricky! Allow the sweatshirt to dry for 4 hours before wearing. As this glue is flexible, I always allow for more time than necessary to make sure it dries fully.
The last step is to wear with gusto at work and show me how you styled it. I actually had 2 people at work yesterday ask me what the ‘S’ stood for…. ?? I was clearly a little concerned that they didn’t know who had been giving them all those presentations for the last year and a half…
Anyway do you think you would try this DIY? Are you ready to dip your toe back into the sis-boom-bah rah-rah-rah of high school varsity life? No? Good, then this sweatshirt is all you need for a little personal nostalgia.
I would also love to hear your feedback about what other DIYs you would be interested in me doing. I love getting crafty, so would appreciate any ideas or topics you would be interested in!


